How to Set Up a Facebook Business Page.
- Get link
- X
- Other Apps
- 1-Create a Facebook Page
- 2-Add photos
- 3-Add a short description
- 4-Create a username for your Page
- 5-Add your Page to Shortcuts
- 5-Set up Page roles
- 6-Customize your notifications
- 7-Add a Page CTA
- 8-Organize your Page tabs
- Verify your Page
If you’ve decided to build a Facebook Page for your business, you’ve made the right choice. In fact, you’ll be joining 70 million businesses worldwide who already market via Facebook Page — a number that's jumped by 1 million in the last few years.
Before we get into publishing content and boosting posts with free organic search, let’s rewind to the very beginning and walk through the setup process.
1. Create a Facebook Page
As you probably know, the majority of Facebook is made up of personal profiles. However, if you’re a business looking to establish your presence on the social network, you’ll need to create a Page instead.
Pages are Facebook’s equivalent of a business profile. Pages look similar to profile
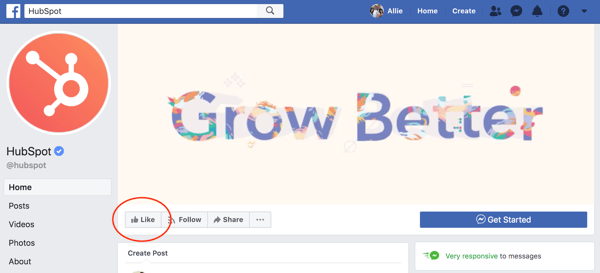
To get started building your own Facebook Page, go to https://www.facebook.com/pages/create/.
There, you’ll have two categories to choose from:
- Business or Brand
- Community or Public Figure
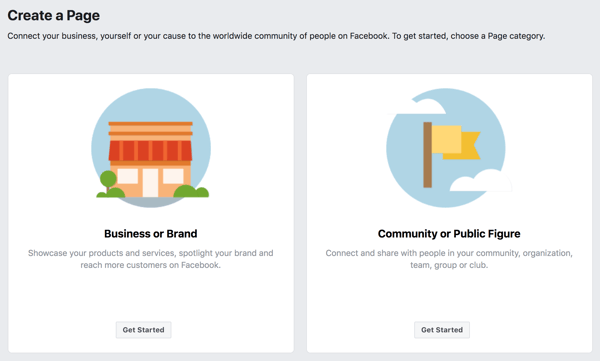
Facebook offers two categories so you can better customize the fields on your Page. For the purpose of this introduction, let’s say we’re a “Business or Brand.” We’ll create a Page for a (completely fictitious) company called Boston Coat Company and categorize it as a Retail Company. (To choose a category, simply start typing and choose from the drop-down list.)
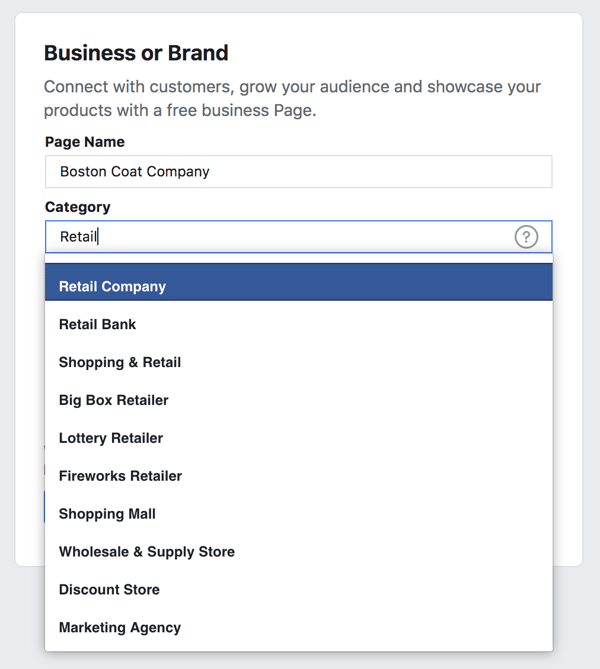
We recommend you choose the name for your Page wisely. Facebook will let you change your name and URL in most cases, but it can be a difficult and tedious process.
If you haven’t already, you’ll be prompted to sign into Facebook at this point. You must create and manage Pages from your personal Facebook account; however, your personal information won’t appear on the Page unless you add it.
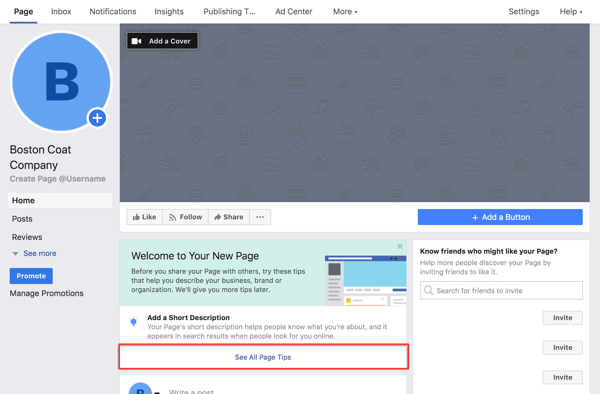
Press “Get Started” and you’ll be automatically redirected to add a Profile Photo and Cover Photo for your new Page. (You can skip these steps and do them later, but we recommend getting them out of the way now.)If you do skip, however, you'll see your new Facebook Page as well as a few tips for building the foundation of a business Page.
2. Add Photos
Add a Profile Picture
The first step to giving your Facebook Page an identity is adding a profile picture. This will serve as the primary visual for your Page, appearing in search results and alongside any of your content that shows up in a user’s News Feed. Most publishers suggest creating a photo that’s 180 x 180 pixels, however increasing this slightly will help maintain quality. If you don’t upload an image that is already square, you’ll be prompted to crop.
Think of your profile picture as your first impression, and be sure to choose something immediately recognizable (like a logo). If you’re a speaker or public figure, go with a favorite headshot. Local restaurants or shops may choose an image of their most popular offering.
Add a Cover Photo
Next, Facebook will suggest you add a cover photo. A cover photo is the large, horizontal image that spans the top of your Page. It should express your Page’s identity and can be updated often based on special offerings, campaigns, or seasons.
To upload a cover photo, click the “Add a Cover Photo” option in the welcome menu. The official dimensions of a cover photo are 851 x 315 pixels. However, if your photo is not exact, you’ll have the option to drag to reposition the photo. Press "Save".
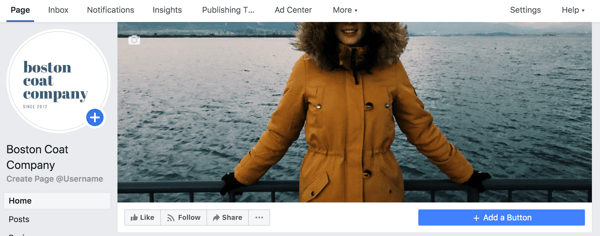
To change your cover photo in the future, hover your mouse over the white camera in the lower right corner of your cover photo and select “Change Cover.” It’s also a good idea to include a sentence of text and a link in the description if you are promoting a specific campaign in your imagery. That way, if your cover photo highlights a new parka, they can seamlessly jump to your winter product line to buy.
Finding the right balance between a cover photo that is both visual and simple can be a challenge. Try going with an abstract image or pattern to catch the eye, or a landscape shot with your product as the focal point. Often, the best cover photos are the ones that use negative space to their advantage.
Facebook Cover Photo Stock Images
Download our free collection of patterns
for your Facebook Page's cover photo.
3. Add a Short Description
Your Page is starting to come together with some beautiful imagery. Next, you’ll need a description to let your audience know what your business is all about.
Click “Add a Short Description” under "Welcome to Your New Page"to get started. Add one to two sentences (or 255 characters max) about your business. This description will appear both on your Page and in search results, so keep it descriptive but succinct. But don’t be afraid to show a bit of your brand’s personality!
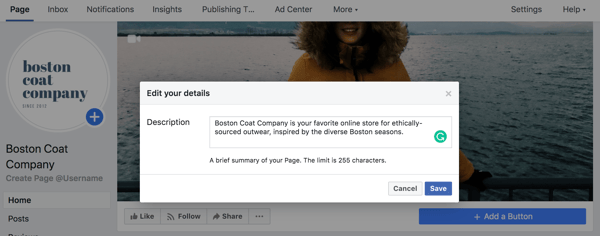
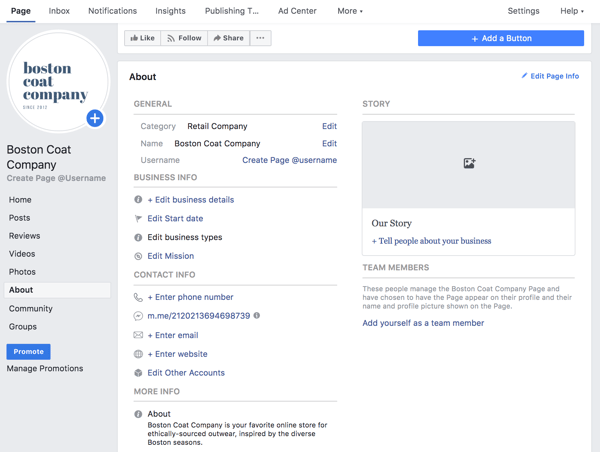
Alternatively, you can edit your description by clicking on “About” in the left menu. There you’ll find the option to include a phone number, website, email, mission, and more.
4. Create a Username for Your Page
The last step on the welcome menu is to create a username for your Page. Your username will appear in your custom Facebook URL (also known as a vanity URL) to help people easily find and remember your Page. You’ll have 50 characters to come up with a unique name not being used by another business.
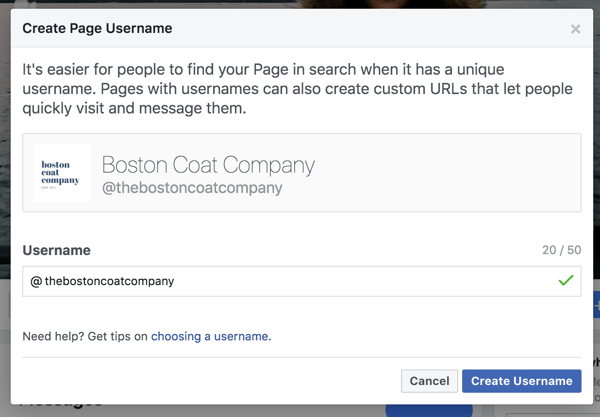
By picking @thebostoncoatcompany for my sample Page, people can automatically visit my Page at fb.me/thebostoncoatcompany or send me messages at m.me/thebostoncoatcompany. Keep your Page’s unique URLs handy. You’ll use them again when you begin cross-promoting your Page on your website, blog, and other assets to get more Facebook likes.
5. Add Your Page to Shortcuts
We finished the four steps from Facebook’s welcome menu, but there are still a few things you can do to customize your Page. For example, every Facebook user has a vertical navigation bar to the left of their News Feed. By adding your Page as a shortcut here, you’ll always have easy access. Go to your News Feed and click on “Edit” next to “Shortcuts” in the left vertical navigation to make it easy to navigate to your Page in the future.
6. Set Up Page Roles
With the basic skeleton of your Page complete, there’s an important step you’ll want to take before you send the Page out to the world … or even your co-workers. Remember how Facebook creates business Pages separate from personal profiles? One benefit of this is so multiple people from an organization can edit and post from the Page without sharing login credentials. But that also means you need to designate who has what levels of editing access. That’s where Page Roles comes in.
On the top navigation bar, locate “Settings.”
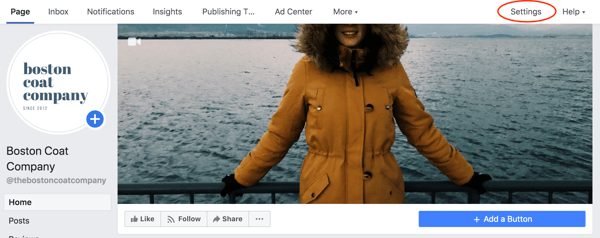
Then click on“Page Roles” in the left navigation bar. There are a few options when adding a collaborator:
- Admin: Admins can manage all aspects of the Page, meaning they can send messages, publish as the Page, respond or delete comments, create ads, see which admin published a specific post, and assign Page roles. This person would have all the same permissions as the creator of the Page. Choose wisely.
- Editor: Editors have the same permissions as Admins except for one key difference: Editors can’t assign Page roles to other people.
- Moderator: Moderators can send messages and respond to and delete comments, but they can’t publish as the Page. They do have access to create ads.
- Advertiser: Just as it sounds, Advertisers can create ads and view insights.
- Analyst: Analysts don’t have any publishing power whatsoever, but they can see which Admin published a specific post and view insights.
- Jobs Manager: Jobs Managers can do everything that an Advertiser can do as well as publish and manage jobs.

7. Customize Your Notifications
While you’re in the settings menu, jump up to “Notifications.” This section allows you to customize how you receive alerts for activity on your Page. For example, you could choose to get a notification every time there is an activity or just get one notification every 12 to 24 hours.
8. Add a Page CTA
One of the top benefits of having a Facebook Page for your business is the ability to attract an audience you might not have been able to reach with a traditional website. However, the typical buyer’s journey doesn’t end on Facebook.
Starting in December 2014, Facebook allowed Pages to include a call-to-action button at the top of the Page. To create one, click “+ Add a Button” below your cover photo. You can choose from an array of choices depending on if you want view or book a service, get in touch, make a purchase or donation, download an app, or simply learn more.
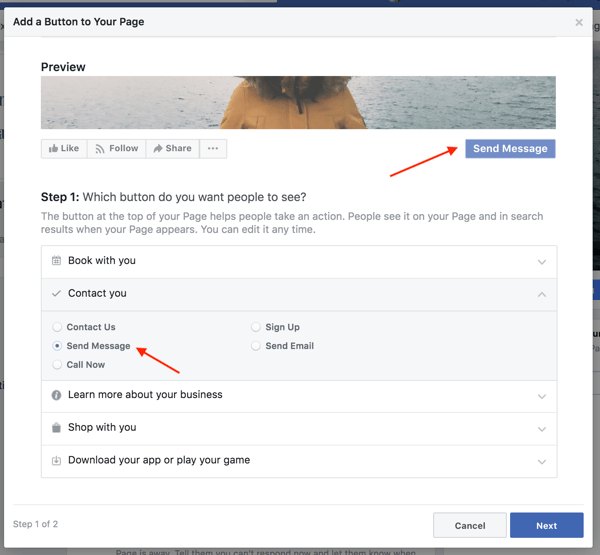
Click "Next" and choose a link for the CTA to lead to, such as your homepage, Messenger, a landing page, or a video.
9. Organize Your Page Tabs
Want to take your business Page to the next level? Add custom tabs to tailor what content users see when they visit your Page. For example, when you visit Starbucks’ Page, there’s an option to browse photos, see open jobs, visit its Pinterest account, or find a store near you.
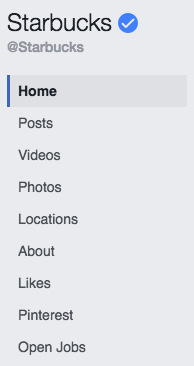
To change the tabs on your Page, go to "Settings" > “Templates and Tabs”. You can choose to use Facebook's default tabs, or you can add additional ones. You can also create a custom app via the Facebook Developer portal.
10. Verify Your Page
Have you ever noticed a tiny gray or blue checkmark next to the names of some businesses and brands?
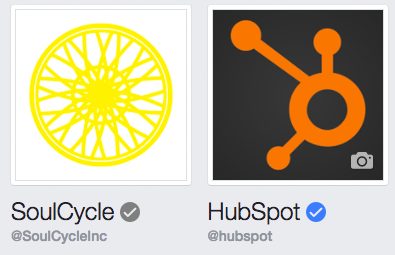
Depending on how you categorized your Page, you could be eligible for a verification badge. A blue badge means that Facebook has confirmed an authentic Page for a public figure, media company or brand. Agray badge means that Facebook has confirmed an authentic Page for a business or organization.
A verification badge is by no means necessary, but it does add a sense of authority to your Page and business. This could be particularly important for businesses in e-Commerce or online services looking to build trust with potential customers and initiate transactions online.
To ensure you're eligible, confirm that your Page has a profile picture and cover photo. Go to “Settings” > "General". There you’ll find “Page Verification” where you can enter your publicly listed phone number, country, and language. You'll receive a call with a verification code.
The blue check badge is only available to some public figures, celebrities, and brands. Unfortunately, it’s not possible to request a blue badge.
Of course, you want your Facebook business Page to be successful. However, what success looks like on social media will vary based on your business goals. Your top focus could be launching new products, building awareness, driving sales, or collecting leads.
- Get link
- X
- Other Apps


Comments
Post a Comment